
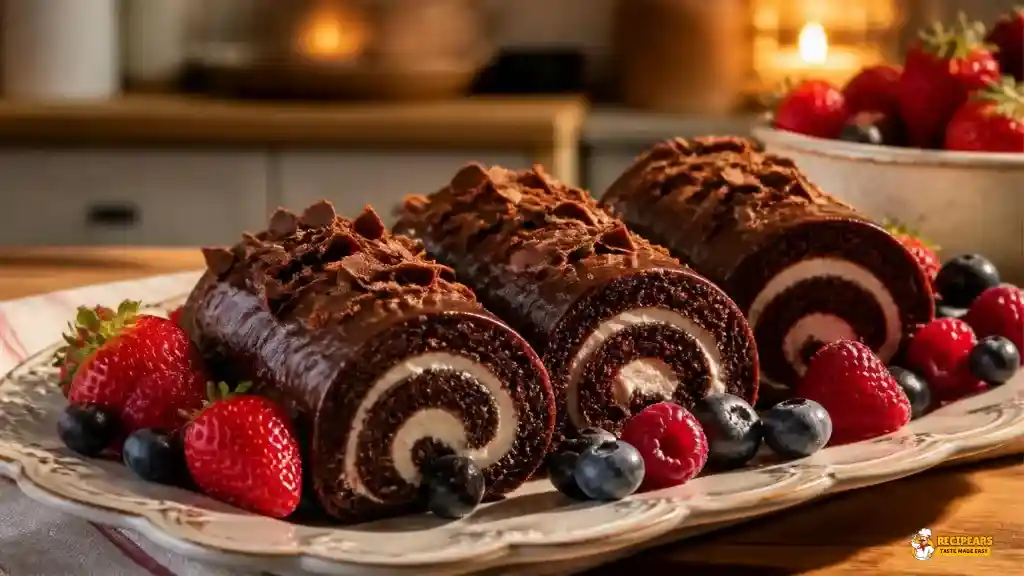
I wanted to recreate the joy I felt eating a chocolate roll snack cake as a child by making it at home. After testing the recipe many times, I finally found the perfect combination of soft chocolate sponge, creamy filling, and chocolate cake roll coating.
After years of working with copycat snack recipes, many people like this version better than the store-bought original. If you want to have fun with your kids or for yourself, try making this Chocolate Roll Snack Cakes Recipe it’s a very fun project.
What Does Chocolate Roll Snack Cakes Taste Like?
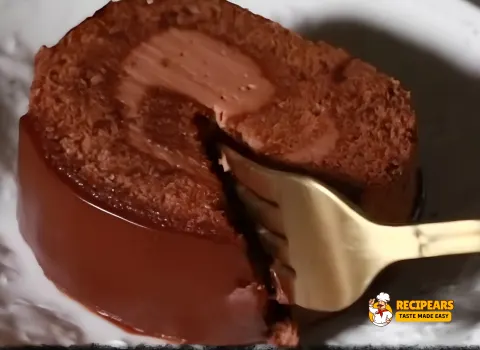
These homemade treats are incredibly soft, moist, and rich in chocolate flavor. The light chocolate sponge cake wraps around a fluffy whipped cream filling that creates the perfect balance of sweetness and creaminess in every bite. The smooth chocolate glaze coating adds a luxurious finish while enhancing the rich chocolate flavor without overpowering the delicate sponge cake.
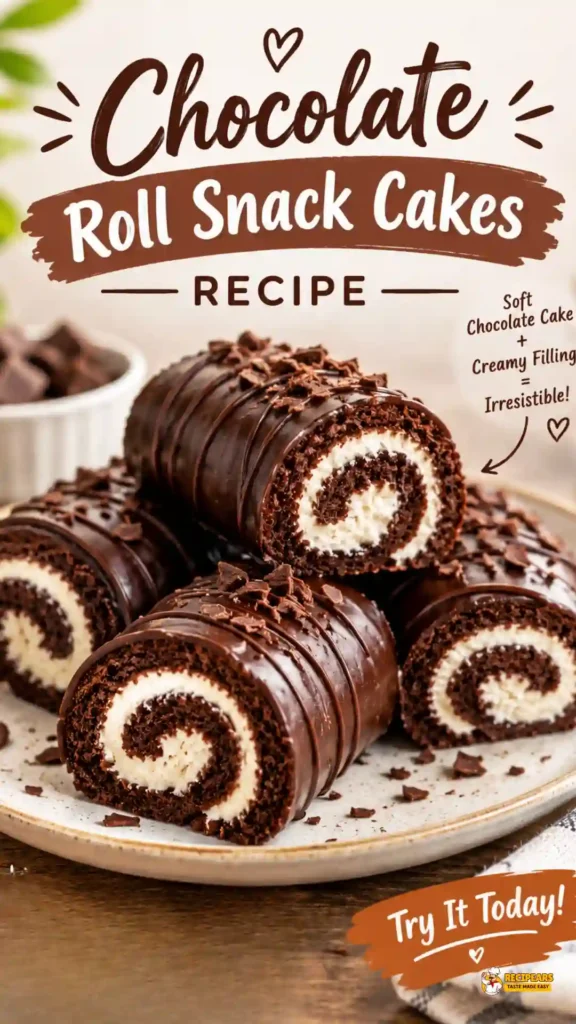
Every slice has a beautiful spiral design, making it look just as impressive as it tastes. Compared to packaged snack cakes, this homemade version has a fresher taste, lighter texture, and deeper chocolate flavor. Because it’s made from scratch using quality ingredients, every bite feels soft, creamy, and bakery fresh. This chocolate roll snack cakes recipe is sure to impress both children and adults alike.
Ingredients for Chocolate Roll Snack Cakes
Making these snack cakes requires only a handful of simple baking ingredients. Each one plays an important role in creating a soft chocolate sponge, a light whipped cream filling, and a smooth chocolate glaze coating.
- 1 cup all-purpose flour
- ¼ cup unsweetened cocoa powder
- 1 teaspoon baking powder
- ¼ teaspoon salt
- 4 large eggs
- ¾ cup granulated sugar
- 1 teaspoon vanilla extract
- ¼ cup vegetable oil
- ¼ cup milk
- Fresh whipped cream
- Homemade chocolate ganache
- Powdered sugar for dusting
Tools and Equipment Required
- Large mixing bowls
- Hand mixer or stand mixer
- Measuring cups and measuring spoons
- Whisk or silicone spatula
- Baking sheet pan
- Parchment paper
- Oven
- Cooling rack
- Clean lint-free kitchen towel
- Plastic wrap
- Wire rack for the coating step
- Serrated knife for slicing
Cooking Time
- Prep Time: 20 Minutes
- Cook Time: 10 Minutes
- Chilling Time: 30 Minutes
- Total Time: About 1 Hour
- Servings: 6 People
How to Make Chocolate Roll Snack Cakes Recipe
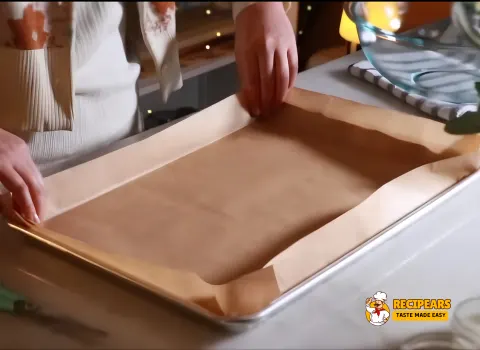
Step 1: Prepare the Dry Ingredients: Start by preheating your oven to 375°F (190°C). Line a baking sheet with parchment paper and lightly grease it to prevent sticking. In a large mixing bowl, whisk together the flour, cocoa powder, baking powder, and salt until everything is evenly combined and free of lumps. Set the dry ingredients aside while you prepare the batter.
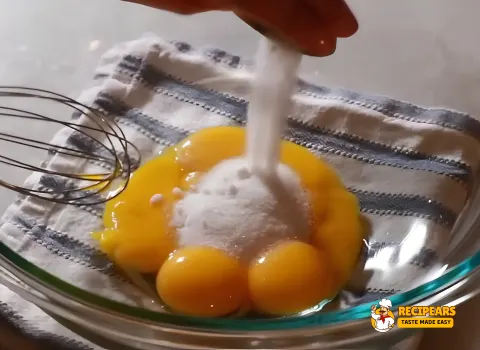
Step 2: Beat the Eggs and Sugar: In another large bowl, combine the eggs and granulated sugar. Using a hand mixer or stand mixer, beat on high speed for about 5 minutes, or until the mixture becomes pale yellow, thick, and fluffy. This is one of the most important steps because the air you incorporate creates the light, soft sponge that makes Swiss rolls so delicate.
Step 3: Prepare the Batter: Add the vanilla extract, vegetable oil, and milk to the whipped egg mixture and gently mix until combined. Next, divide the dry ingredients into two portions. Fold each portion into the wet mixture using a silicone spatula. Mix gently using a folding motion until no dry flour remains. Avoid over-mixing, as this can remove the air from the batter and result in a dense, heavy sponge cake.
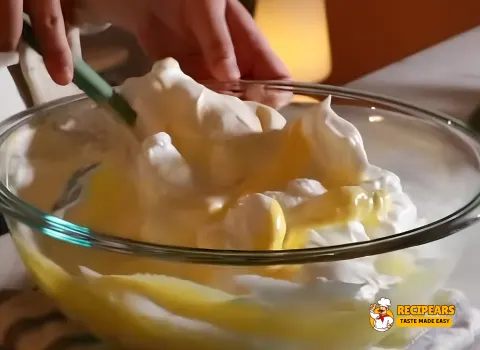
Step 4: Bake the Sponge Cake: Pour the batter into the prepared baking pan and spread it evenly with a spatula. Bake for 10–12 minutes, or until the center springs back lightly when touched. Be careful not to over-bake the sponge. A dry cake is much more likely to crack when rolled.
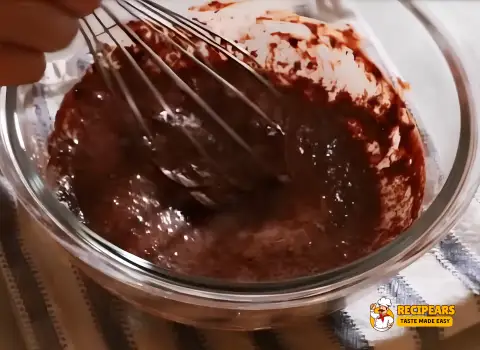
Step 5: Roll the Cake While Warm: While the cake is still hot, dust a clean kitchen towel lightly with powdered sugar. Carefully invert the cake onto the towel and gently peel away the parchment paper. Starting from one short end, roll the cake tightly together with the towel. Allow it to cool completely in this rolled shape. This helps the sponge “remember” its shape and reduces the risk of cracking later.
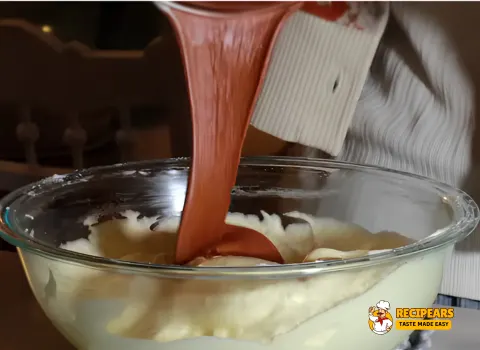
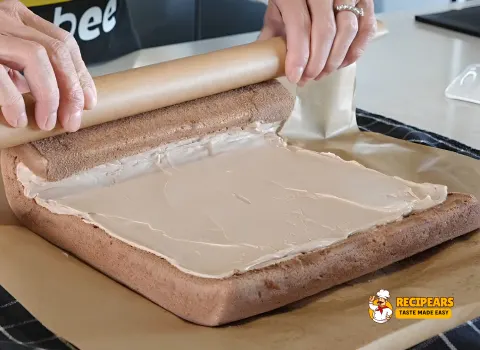
Step 6: Add the Whipped Cream Filling: Once the cake has cooled completely, carefully unroll it. Spread an even layer of whipped cream across the surface, leaving about a ½-inch border around the edges. Roll the cake tightly again, this time without the towel. Wrap it securely in plastic wrap and refrigerate for 30 minutes so the filling can firm up and the cake holds its shape.
Step 7: Coat with Chocolate Ganache: Remove the chilled cake roll from the refrigerator. Slice it into pieces about 1½ inches thick using a sharp serrated knife. Arrange the slices on a wire rack placed over a baking tray. Slowly pour warm chocolate ganache over each piece, allowing it to coat the cakes evenly. Leave the cakes at room temperature for about 15 minutes until the ganache sets into a smooth, glossy finish. Serve immediately or refrigerate until ready to enjoy.
Serving Ideas for Chocolate Roll Snack Cakes Recipe
1. Dessert Charcuterie Board: Arrange sliced rounds on a wooden board with fresh berries, mint sprigs, and extra chocolate shavings scattered around for an easy, shareable party centerpiece.
2. Mini Trifle Cups: Cube leftover slices and layer them in small glasses with extra whipped cream and berries for a quick, no-bake trifle that’s perfect for using up cake ends.
3. Ice Cream Sandwich Twist: Slice the roll slightly thicker, then sandwich a scoop of vanilla or mint ice cream between two spiral pieces. Freeze briefly before serving for a firmer, more scoopable bite.
4. Brunch Plate Pairing: Serve a slice alongside fresh fruit and a light dusting of powdered sugar for a not-too-sweet addition to a weekend brunch spread, especially nice next to coffee or espresso. For a refreshing side, try this cucumber salad.
5. Drizzle and Garnish Bar: Set out warm caramel, crushed nuts, sprinkles, and extra chocolate ganache so guests can customize their own slice tableside, a playful option for kids’ parties. For a savory pairing, add this Cantina chicken.
6. Holiday Log Presentation: Skip slicing and present the whole rolled cake dusted with powdered sugar snow, topped with a sprig of rosemary and sugared cranberries for a festive Yule log-style display.
7. Individually Wrapped Grab-and-Go: Wrap single slices in parchment and twine for lunchboxes, bake sales, or picnics, a homemade nod to the classic snack-cake format that inspired this recipe.
Community Tips for Making Chocolate Roll Snack Cakes Recipe
Making this dessert at home is easy, but a few expert baking techniques can make a big difference. Follow these tips to achieve a soft sponge, smooth filling, and a beautiful bakery-style finish every time.
1. Don’t Over-bake the Sponge Cake: Bake the sponge just until the center springs back when lightly touched. Even a few extra minutes in the oven can dry out the cake, making it more likely to crack when you roll it.
2. Roll the Cake While It’s Still Warm: As soon as the cake comes out of the oven, transfer it to a clean kitchen towel dusted with powdered sugar and roll it immediately. Rolling the sponge while it’s warm helps it keep its shape and greatly reduces the risk of cracking after adding the filling.
3. Use a Clean, Thin Kitchen Towel: Choose a thin, lint-free towel for rolling the cake. A light dusting of powdered sugar prevents sticking and keeps the sponge looking smooth and professional.
4. Beat the Whipped Cream Properly: Whip the cream until stiff peaks form. If the cream is too soft, it may squeeze out while rolling or slicing, making the finished cakes look messy.
5. Chill Before Coating: After filling and rolling the cake, refrigerate it for at least 30 minutes. A chilled cake holds its shape better and allows the warm chocolate glaze to coat the surface evenly without melting the filling.
6. Spread the Filling Evenly: Spread the whipped cream into an even layer, leaving about a half-inch border around the edges. This prevents excess filling from spilling out and creates a beautiful spiral inside every slice.
7. Slice with a Serrated Knife: A sharp serrated knife cuts cleanly through the sponge without compressing the cake. For neat bakery-style slices, wipe the knife clean after each cut.

Chocolate Roll Snack Cakes Recipe

Equipment
- Large mixing bowls
- Hand mixer or stand mixer
- Measuring cups and measuring spoons
- Whisk or silicone spatula
- Baking sheet pan
- Parchment paper
- Oven
- Cooling rack
- Clean lint-free kitchen towel
- Plastic wrap
- Wire rack for the coating step
- Serrated knife for slicing
Ingredients
- 1 cup all-purpose flour
- ¼ cup unsweetened cocoa powder
- 1 teaspoon baking powder
- ¼ teaspoon salt
- 4 large eggs
- ¾ cup granulated sugar
- 1 teaspoon vanilla extract
- ¼ cup vegetable oil
- ¼ cup milk
- Fresh whipped cream
- Homemade chocolate ganache
- Powdered sugar for dusting
Instructions
- Prepare the Dry Ingredients: Start by preheating your oven to 375°F (190°C). Line a baking sheet with parchment paper and lightly grease it to prevent sticking. In a large mixing bowl, whisk together the flour, cocoa powder, baking powder, and salt until everything is evenly combined and free of lumps. Set the dry ingredients aside while you prepare the batter.
- Beat the Eggs and Sugar: In another large bowl, combine the eggs and granulated sugar. Using a hand mixer or stand mixer, beat on high speed for about 5 minutes, or until the mixture becomes pale yellow, thick, and fluffy. This is one of the most important steps because the air you incorporate creates the light, soft sponge that makes Swiss rolls so delicate.
- Prepare the Batter: Add the vanilla extract, vegetable oil, and milk to the whipped egg mixture and gently mix until combined. Next, divide the dry ingredients into two portions. Fold each portion into the wet mixture using a silicone spatula. Mix gently using a folding motion until no dry flour remains. Avoid over-mixing, as this can remove the air from the batter and result in a dense, heavy sponge cake.
- Bake the Sponge Cake: Pour the batter into the prepared baking pan and spread it evenly with a spatula. Bake for 10–12 minutes, or until the center springs back lightly when touched. Be careful not to over-bake the sponge. A dry cake is much more likely to crack when rolled.
- Roll the Cake While Warm: While the cake is still hot, dust a clean kitchen towel lightly with powdered sugar. Carefully invert the cake onto the towel and gently peel away the parchment paper. Starting from one short end, roll the cake tightly together with the towel. Allow it to cool completely in this rolled shape. This helps the sponge “remember” its shape and reduces the risk of cracking later.
- Add the Whipped Cream Filling: Once the cake has cooled completely, carefully unroll it. Spread an even layer of whipped cream across the surface, leaving about a ½-inch border around the edges. Roll the cake tightly again, this time without the towel. Wrap it securely in plastic wrap and refrigerate for 30 minutes so the filling can firm up and the cake holds its shape.
- Coat with Chocolate Ganache: Remove the chilled cake roll from the refrigerator. Slice it into pieces about 1½ inches thick using a sharp serrated knife. Arrange the slices on a wire rack placed over a baking tray. Slowly pour warm chocolate ganache over each piece, allowing it to coat the cakes evenly. Leave the cakes at room temperature for about 15 minutes until the ganache sets into a smooth, glossy finish. Serve immediately or refrigerate until ready to enjoy.
Video
Notes
- Don’t overbake: Bake the sponge just until it springs back, so your chocolate roll snack cakes stay soft and don’t crack.
- Roll while warm: Roll the sponge in a powdered sugar-dusted towel right out of the oven, then cool completely.
- Chill before glazing: Refrigerate the filled roll for 30 minutes so the chocolate ganache coats evenly.
- Storage: Keep homemade chocolate roll snack cakes in an airtight container in the fridge for up to 4 days.
- Freezing: Freeze individually wrapped slices for up to 1 month. Thaw overnight in the fridge.
- Serving: Serve chilled. Don’t reheat.
How to Store Leftover Chocolate Roll Snack Cakes Recipe
1. Refrigerator Storage: Because Chocolate Roll Snack Cakes are filled with fresh whipped cream, they should always be stored in the refrigerator. Place the cakes in an airtight container or wrap them tightly with plastic wrap to keep them fresh. They will stay delicious for up to 4 days while maintaining their soft texture and creamy filling.
2. Freezer Storage: For longer storage, wrap each slice individually in plastic wrap or aluminum foil, then place them in a freezer-safe bag or airtight container. The cakes can be frozen for up to 1 month. When you’re ready to enjoy them, transfer the slices to the refrigerator and let them thaw overnight.
3. Reheating and Serving: These Chocolate Roll Snack Cakes are best served chilled or at room temperature. Simply remove them from the refrigerator about 10–15 minutes before serving for the best texture and flavor. Since the filling is made with whipped cream, reheating is not recommended, as it can cause the filling and chocolate glaze to soften or melt.
Common Queries on Chocolate Roll Snack Cakes Recipe
What is a Chocolate Roll Snack Cake?
It’s a soft chocolate sponge cake rolled with a light whipped cream filling and coated in rich chocolate glaze. Its signature spiral design, moist texture, and creamy center make it a favorite homemade dessert for both children and adults.
Is a Homemade Version Better Than Store-Bought?
Yes. Homemade versions are made with fresh ingredients, real whipped cream, and high-quality cocoa powder, giving them a richer chocolate flavor, softer texture, and fresher taste than most packaged snack cakes.
Why Did My Cake Crack?
The sponge cake may crack if it is over-baked, rolled after it has cooled, or rolled too loosely. For the best results: Roll the cake while it’s still warm. Avoid over-baking. Use a clean kitchen towel to help the sponge hold its shape.
Can I Make Mini Versions?
Absolutely. After rolling the cake, simply slice it into smaller portions to create bite-sized treats that are perfect for parties, lunch boxes, or dessert platters.
Can I Use Another Filling Instead of Whipped Cream?
Yes. You can substitute it with: Chocolate buttercream, Cream cheese filling, mascarpone filling, stabilized whipped cream. Each option creates a slightly different flavor and texture.
How Do I Get Smooth Chocolate Ganache?
Heat the chocolate and cream gently until smooth. Allow the ganache to cool for a few minutes before pouring so it coats the cake evenly with a glossy finish.
Can I Make This Recipe Ahead of Time?
Yes. You can prepare the cake one day in advance and refrigerate it overnight. In fact, chilling allows the flavors to blend and makes slicing much easier.
Why Is My Sponge Cake Dense?
A dense sponge usually happens because: The eggs weren’t beaten long enough. The batter was over-mixed. Too much flour was added. Whipping plenty of air into the eggs and folding the batter gently creates a light and fluffy sponge.
Can I Freeze These Cakes?
Yes. Wrap each slice tightly in plastic wrap before placing it in a freezer-safe container. They freeze well for up to 1 month. Thaw overnight in the refrigerator before serving.
What’s the Difference Between a Swiss Roll and This Recipe?
A classic Swiss Roll can be filled with whipped cream, jam, or buttercream. This version is typically made with chocolate sponge cake, a creamy filling, and a rich chocolate glaze coating, giving it a more indulgent dessert-like flavor.
Conclusion
This recipe is the perfect combination of a soft chocolate sponge, fluffy whipped cream filling, and silky chocolate glaze. Every bite delivers a rich chocolate flavor with a light, creamy texture that’s far better than most store-bought snack cakes. Whether you’re baking for a birthday, holiday gathering, afternoon tea, or simply satisfying a chocolate craving, this homemade treat is guaranteed to impress.
With easy-to-follow instructions, simple ingredients, and helpful baking tips, anyone can create beautiful bakery-style chocolate roll snack cakes at home. Give this recipe a try, share it with your family and friends, and enjoy every delicious homemade bite!